Creating Code Snippets

Creating Code Snippets to Improve Your Productivity
IT Tips & Insights: A Softensity Software Engineer shows you how to save time and tedium when coding by using code snippets.
By Gabriel Lima, Software Engineer
What is a “Code Snippet”?
Have you ever thought “this piece of code couldn’t be replicated in an easy way …”? Or been in situations where you need to copy/paste the same code structure many times? Well, code snippets can help. A code snippet is a piece of code that can be stored as a pre-made, parametrizable and reusable code to make things easier when you’re coding.
Building Your Own Code Snippets
For this implementation I’m going to show you how to create your own code snippet that returns an array of bytes from any string sent by parameter, for Microsoft Visual Studio IDE and C# language snippets.
Visual Studio – Code Snippets
For Microsoft Visual Studio, the base structure to create a code snippet is XML (Extensible Markup Language) based. Below we have the code example, but first, let’s understand how the template works and learn what each tag does:
<?xml version="1.0" encoding="utf-8"?>

<CodeSnippets xmlns="http://schemas.microsoft.com/VisualStudio/2005/CodeSnippet">

  <CodeSnippet Format="1.0.0">

            <SnippetTypes>

                <SnippetType>Expansion</SnippetType>

            </SnippetTypes>

            <Header>

            <Title>GetBytesASCII</Title>

            <Shortcut>bytesascii</Shortcut>

            <Description>Code snippet that implements a method that returns the bytes from a string using the ASCII encoding</Description>

            <Author>Gabriel Lima</Author>

        </Header>

    <Snippet>

        <Declarations>

            <Literal>

                <ID>name</ID>

                <ToolTip>Method name</ToolTip>

                <Default>GetBytesASCII</Default>

            </Literal>

        </Declarations>

        <Code Language="CSharp">

            <![CDATA[public byte[] $name$ (string text)

{

return Encoding.ASCII.GetBytes(text);

}]]>

        </Code>

      <Imports>

        <Import>

          <Namespace>System.Text</Namespace>

        </Import>

      </Imports>

    </Snippet>

  </CodeSnippet>

</CodeSnippets>
<CodeSnippets> tag is the root of our file definition. Here, you can define one or more <CodeSnippet> child tags and implement how many snippets you want.
Inside each <CodeSnippet> tag, we have the <SnippetTypes> followed by the <SnippetType> declaration. Here, we can set the type of the snippet as an Expansion (that inserts the snippet code at the current text cursor) or a SurroundWith (that will insert it in the code editor before and after the current selection). For this example, we are using the Expansion type.
After this section we have the <Header> and we have some important declarations like the <Title>, <Shortcut>, <Description> and the <Author>. Part of this info will be displayed when you try to use it in the code editor. Specifically <Shortcut> will be your snippet name; typing it, you will trigger the code snippet.
Now we find the most important part of our code, the <Snippet> section. Starting with the <Declarations> tag, we define our <Literal> properties <ID>, <ToolTip> and <Default> values which will display and enable the navigation with the “tab” key from your keyboard of the properties defined later at <Code> section.
On the <Code> section we have the core of our snippet and everything between the <![CDATA[…]> declaration will be displayed on the code editor. In our example, we have the “GetBytesASCII” method definition that will perform the string to byte array conversion.
Finally, the <Imports> section. Since we are using a resource provided by .NET framework under the System.Text namespace, we need to import it to make our code compliable. Just add under an <Import> tag followed by a <Namespace> tag and the magic will happen.
Configuring and Using Your Code Snippet
Now, save your code snippet in a file with the “.snippet” extension in any folder you want. Choose the name of your preference.
*Remember, the <Shortcut> property controls the name into the code editor.
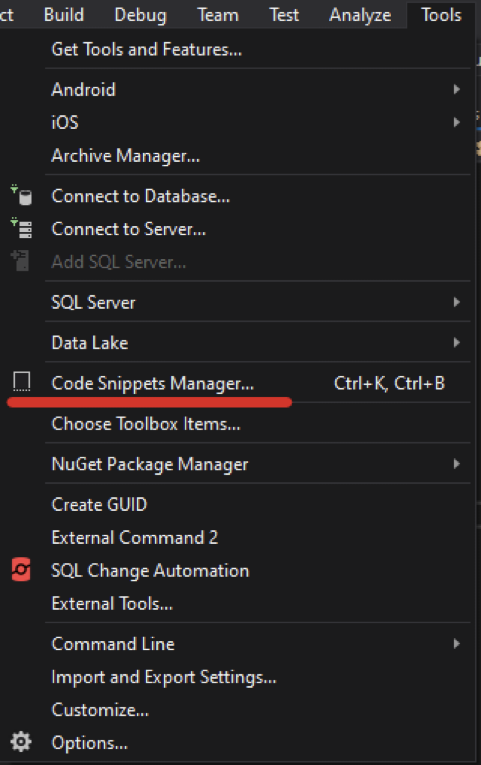
In your Visual Studio IDE, open the Tools > Code Snippets Manager window:
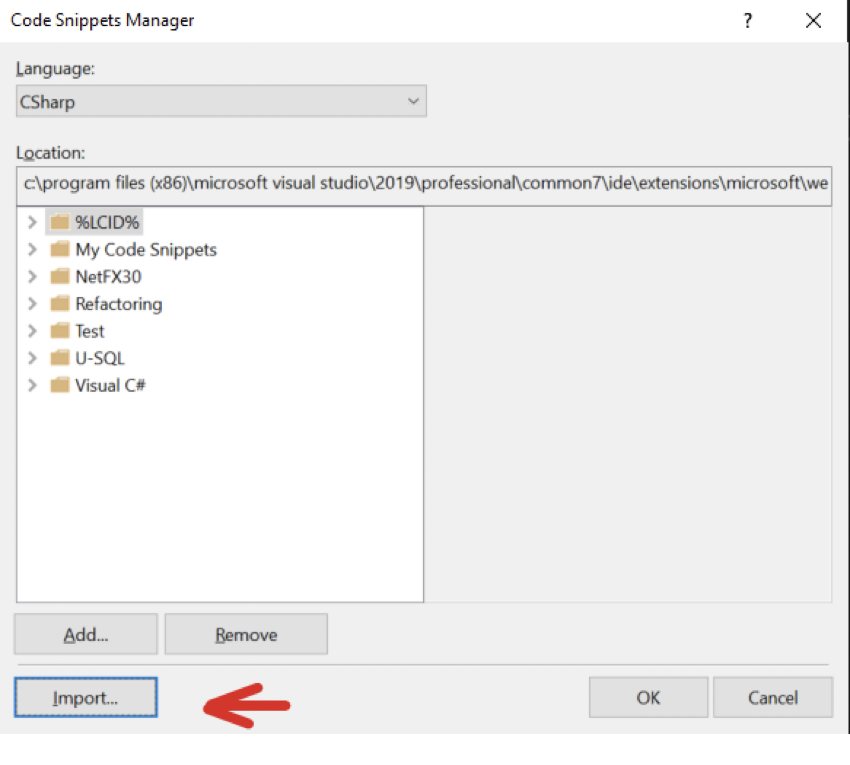
Then, tap the Import button:
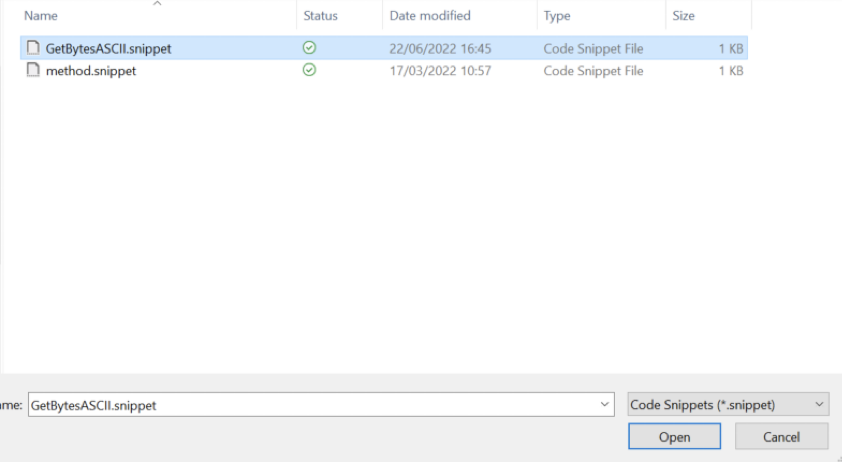
Search for your code snippet file and click Open:
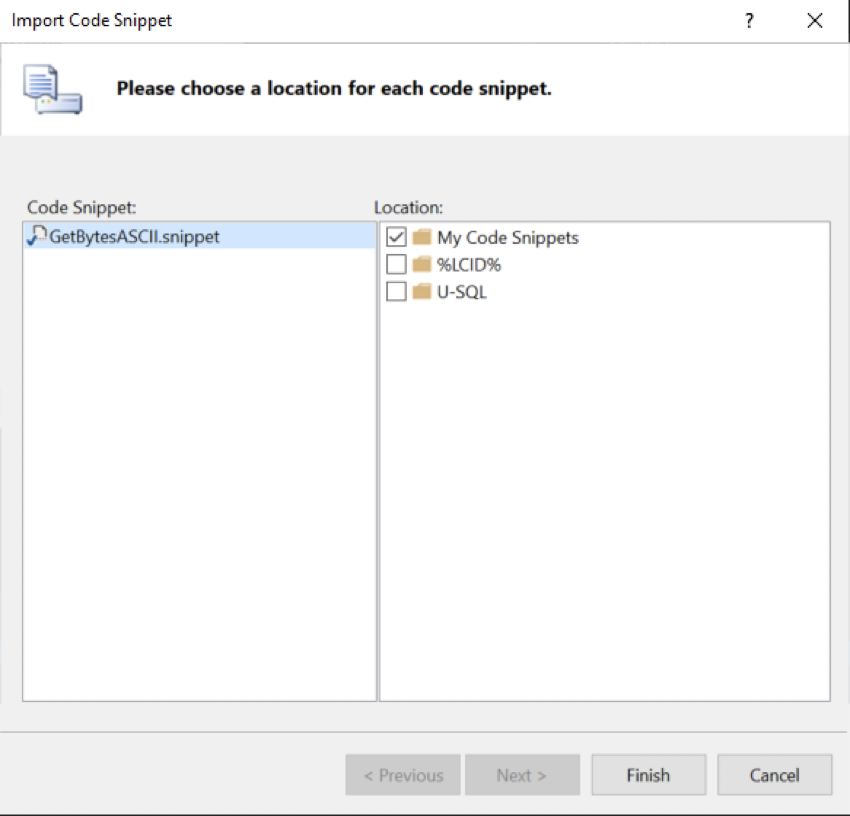
Choose a location for Visual Studio to store your code snippet, then clink Finish and it’s done:
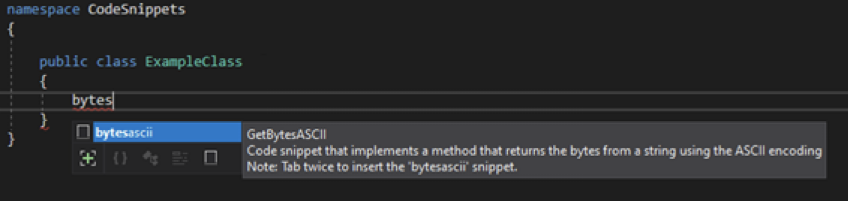
Finally, you can try it out. We have the following result double-taping “tab” after typing the defined <Shortcut> name on the code editor:
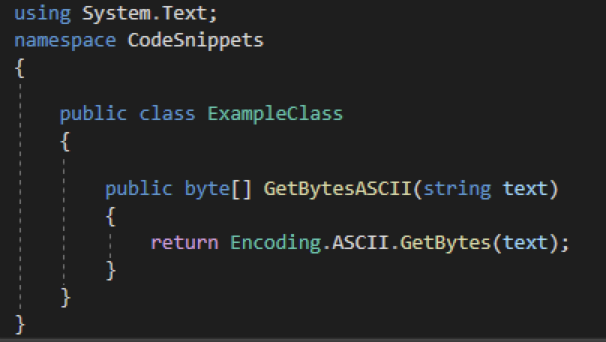
As you can see, we saved some lines of code, auto imported the namespace dependency and provided a method that could be implemented by the whole application. Feel free to explore and play with this amazing tool. You can also extend it to build crud signature methods, generic implementations, design patterns, etc. Basically, whatever you want. I hope I helped you save time coding :).
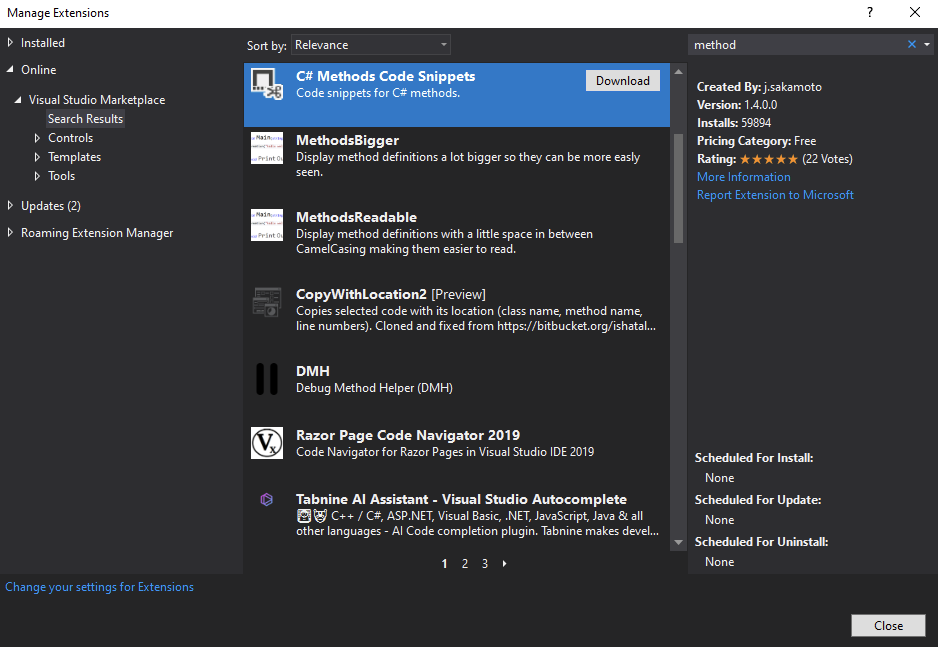
Giving you a code drop, we have a great extension that provides some method creation snippets that you can install for free by using the Extensions > Manage Extensions tool. Just click on download button and enjoy:
Also, you can find out a lot of useful info in the official documentation here.

BIO
Hi! I’m Gabriel Lima, a software developer working with C#/.NET stack since 2017, along with front-end technologies and Microsoft Azure. I enjoy learning about new tips, technologies, concepts and patterns, and implementing them to deliver the best solutions for the applications that I work with.