Azure Key Vault

How To Use Azure Key Vault
IT Tips & Insights: Learn how to set up a Key Vault storage, create a .Net app and read the Key Vault secret from the application you created.
By Alvaro Ribeiro, Software Engineer
Azure Key vault is a cloud service that allows developers to store keys and secrets in a very secure, simple and efficient way. It’s a great idea to use Key Vault to store keys such as passwords, connection strings, and other secrets. It is a good idea to isolate sensitive from non-sensitive keys from your application.
In the following steps, we are going to set up a Key Vault storage, create a .Net application and read the Key Vault secret from our application.
Prerequisites
- Visual Studio 2019
- Azure Account
Create a Web App
In this section we are going to create a web app in the Azure portal with permission to access Azure Key Vault.
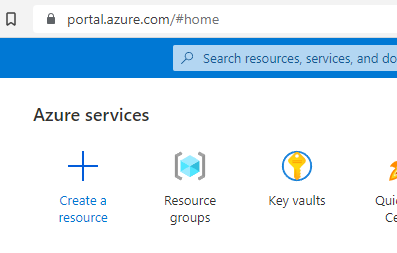
1 – Login to Azure Portal
2 – Click on “Create Resource” button
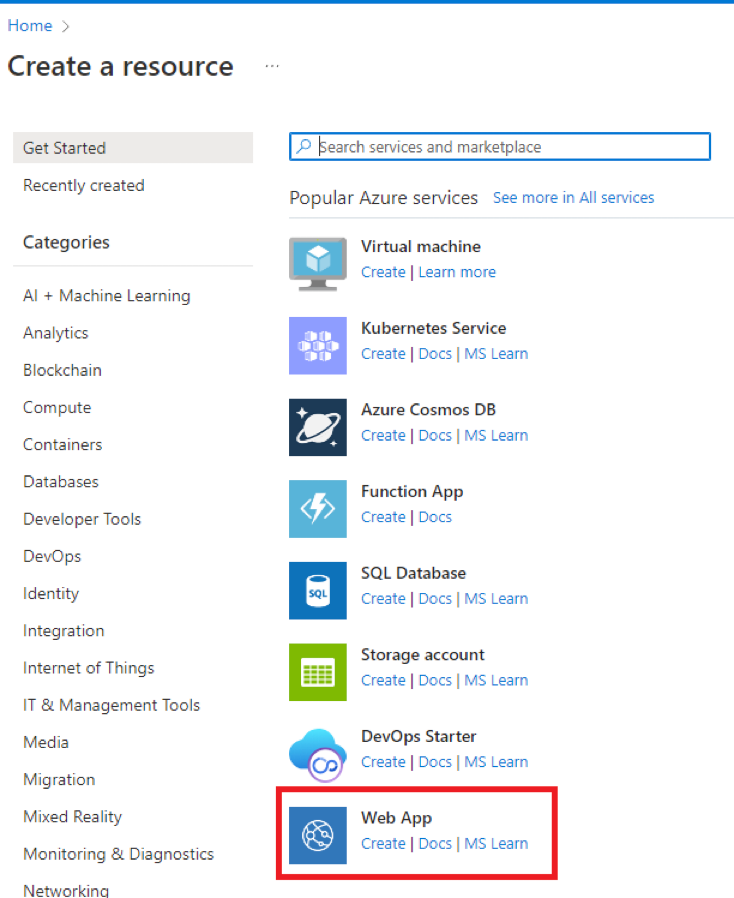
3 – Select Web App from the list
4 – Specify the name and region
5 – Choose “Code” in the publish section
6 – Choose .Net 6 as runtime stack
7 – Choose Windows as Operating System
8 – For the region, choose the closest one to you
9 – Click “Review + Create” button
10 – Once your application is created, click “Go to Resource” button
Set up Identity for your App
1 – Select Identity from the left-side menu
2 – Change the “Status” toggle to “On” and click “Save”
3 – Copy the Object (principal) Id.
Set up a Key Vault
In this section we are going to create and set up a Key Vault resource.
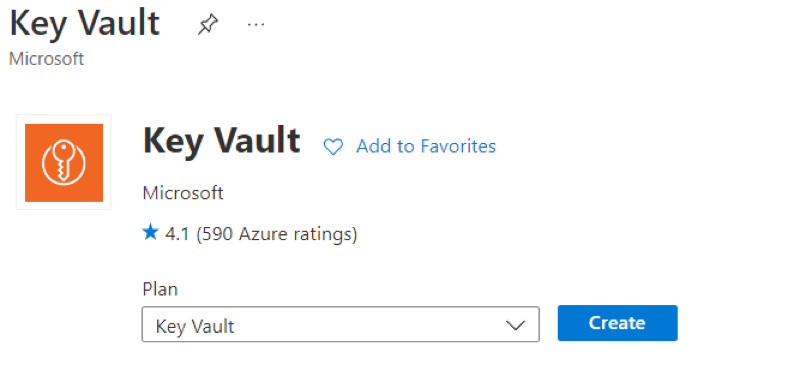
1 – Click on “Create Resource” button
2 – Search the list by “Key Vault” and select “Key Vault” from the list. Click “Create” button
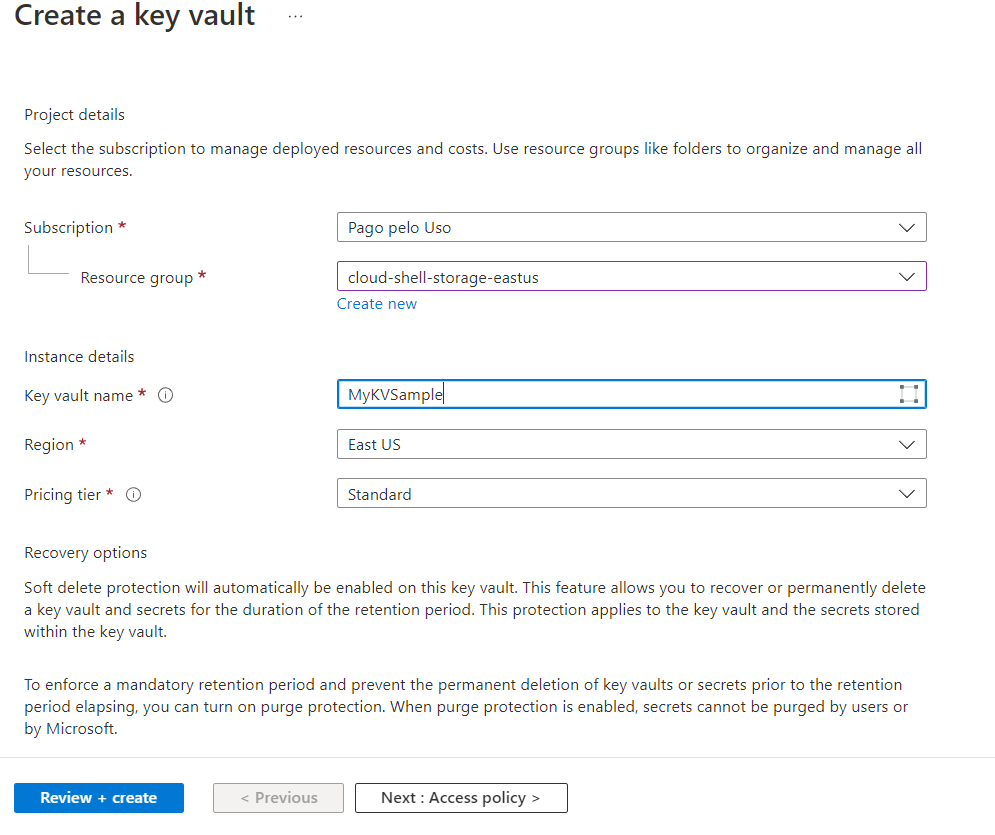
3 – Fill out the form to create a Key Vault resource
4 – Click “Review + Create” button. Once the resource is created, click “Go to resource” to manage it
5 – Select “Secrets” from the left-side menu
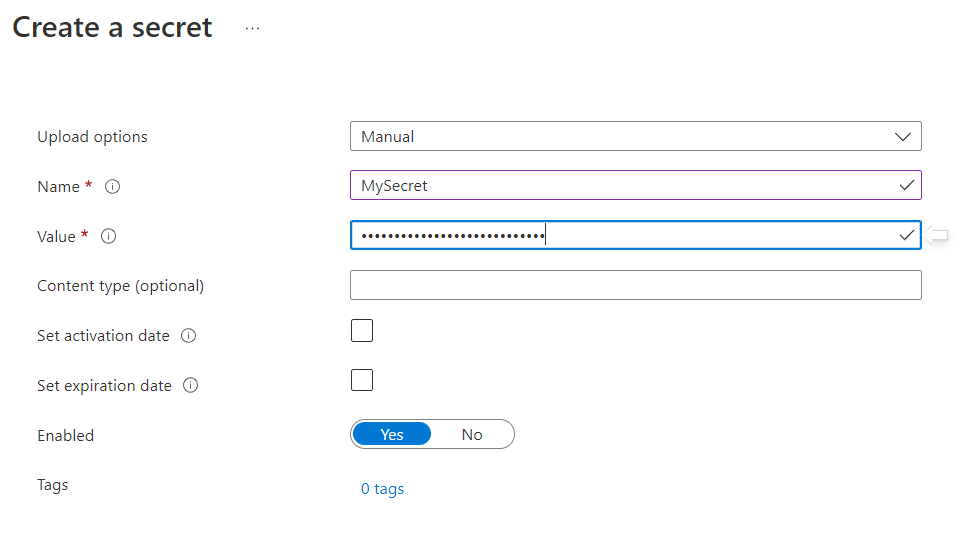
6 – Click “Generate/Import” button to create a secret
7 – Provide the values and click “Create”
8 – Select “Access policies” from the left-side menu
9 – Click “Add access policy” button
10 – In the secret permissions, select “Get” and “List”
11 – In the “Select a Principal” option, specify the value for the “Object Id” you copied previously
12 – Click “Add” button, and then click “Save” button.
Create a .Net Application
In this section we are going to create a new Asp.Net application.
1 – Open Visual Studio 2019 and create a new ASP.NET Core Web API. Select .Net Core 3.1 and C#.
2 – Install Microsoft.Extensions.Azure and Azure.Security.KeyVault.Secrets packages
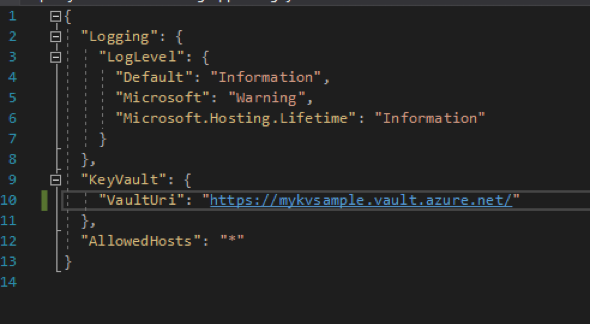
3 – Create a Key Vault section in the appsettings.json
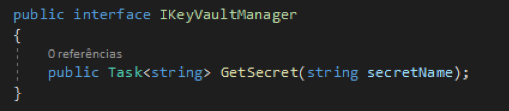
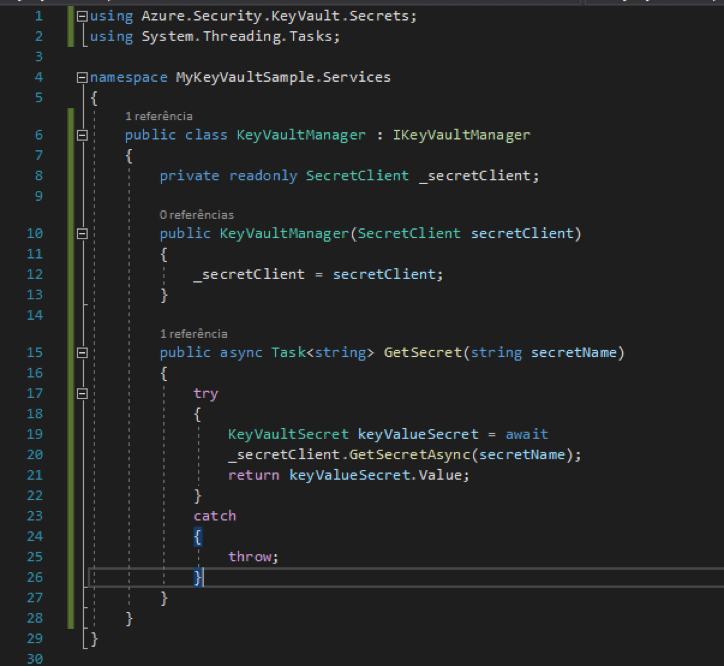
4- Create an interface and an implementation classes to manage Key Vault access
5 – Create the controller
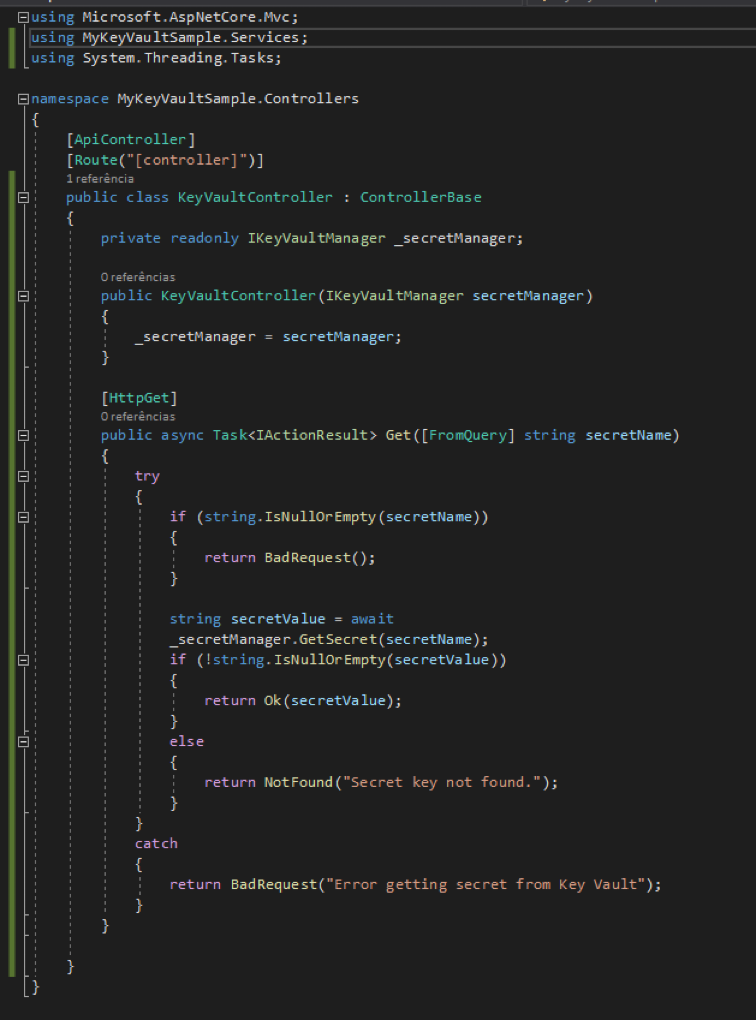
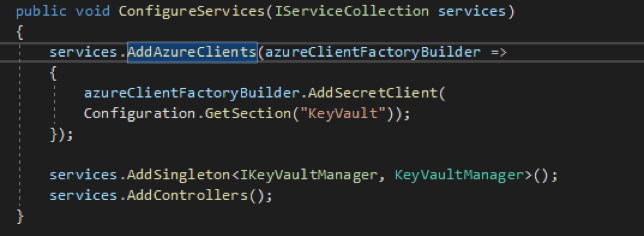
6 – Add the references to startup file
Publish the App
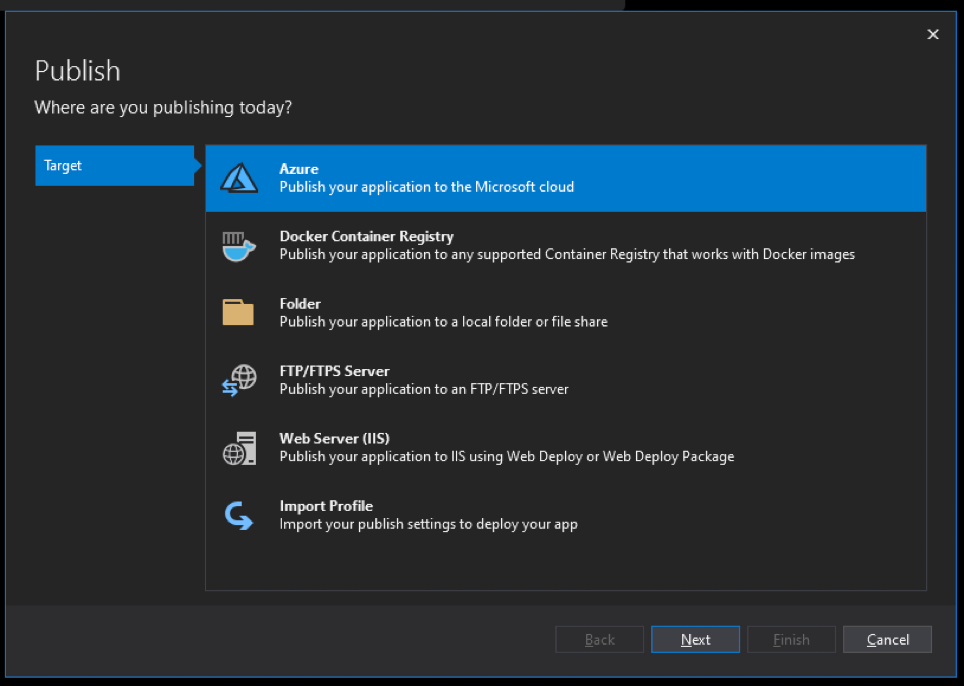
In this section we are going to publish the application to Azure.
1 – Right click on the project name and click then Publish. Choose Azure and click “Next” button.
2 – Select Azure App Service (Windows) and click “Next” button.
3 – Select the application associated with your account and then click “Finish”.
Run the application
In this section we are going to run the application and check the result.
1 – Launch postman and send the following get request:
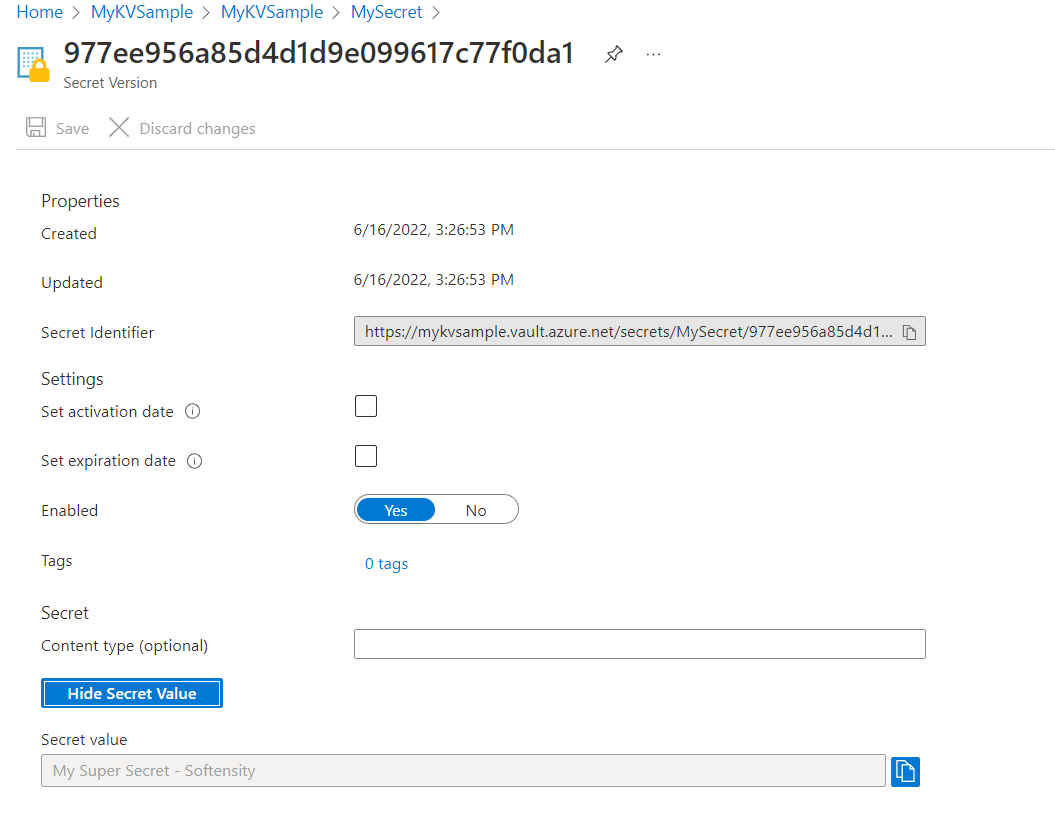
2 – Go to the Azure portal and show the Secret
BIO

Hey people! My name’s Alvaro, I’m from Brazil and I’ve been working as a .Net Developer since 2005. Currently I’m working as a Senior Software Developer at Softensity. Although I enjoy programming with C# and .Net Core, I’m also interested in Bitcoin and Blockchain applications in general.