Creating CI for ADF with Azure DevOps
IT Tips & Insights: A Softensity Data Engineer discusses continuous integration (CI) for Azure Data Factory (ADF) with step-by-step instructions.
By Fernando Messas, Softensity Data Engineer
A few years after releasing Azure Data Factory (ADF), Microsoft has created CI/CD support. It’s a simple process, which we will discuss here. First, your data factory must be linked to a Git repository. In this case, we are using Azure DevOps. You set up a Git repo open to ADF creation, just by filling the repo data there. In this post we will pretend to work with a pre existing instance.
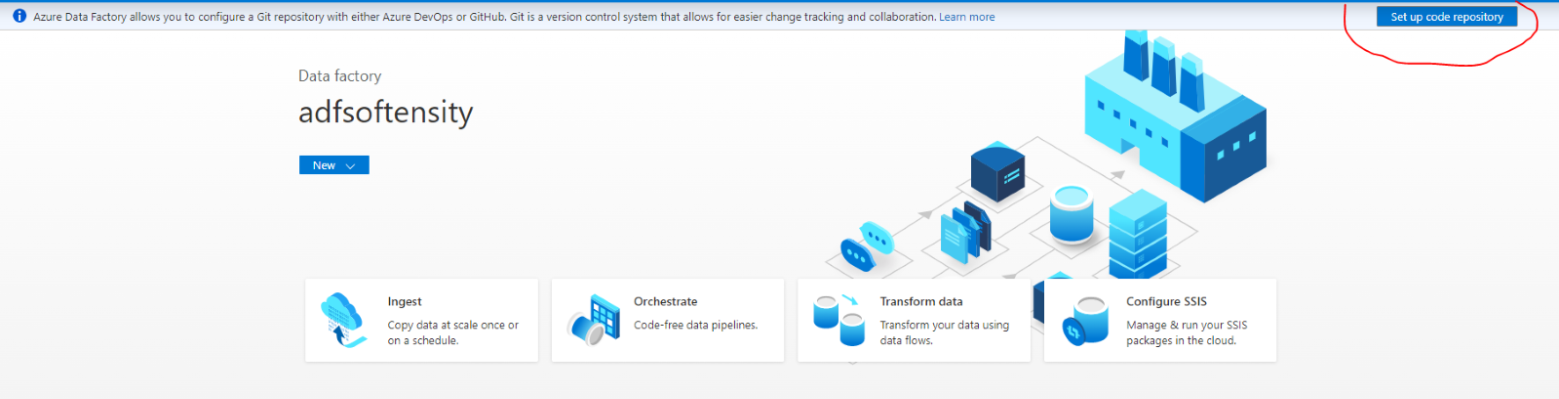
First click in setup code repository, on the upper right corner.
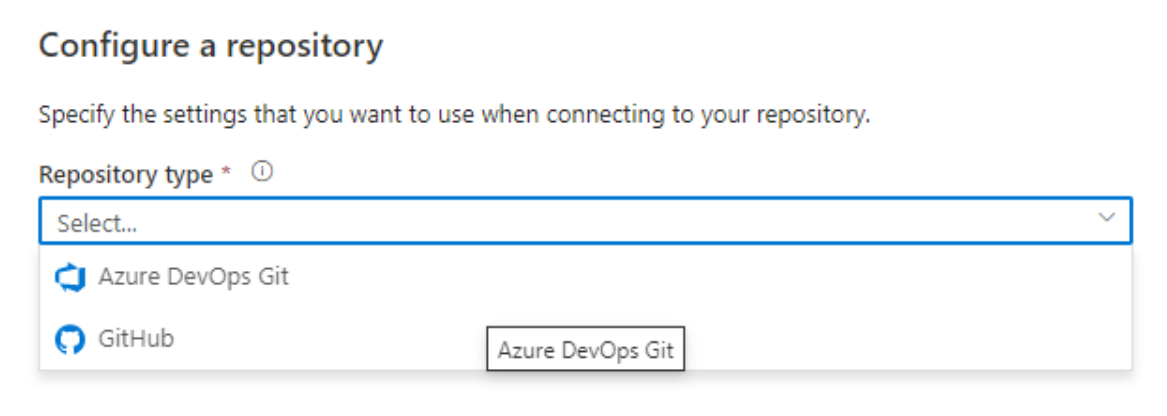
You can choose either Azure DevOps or GitHub.
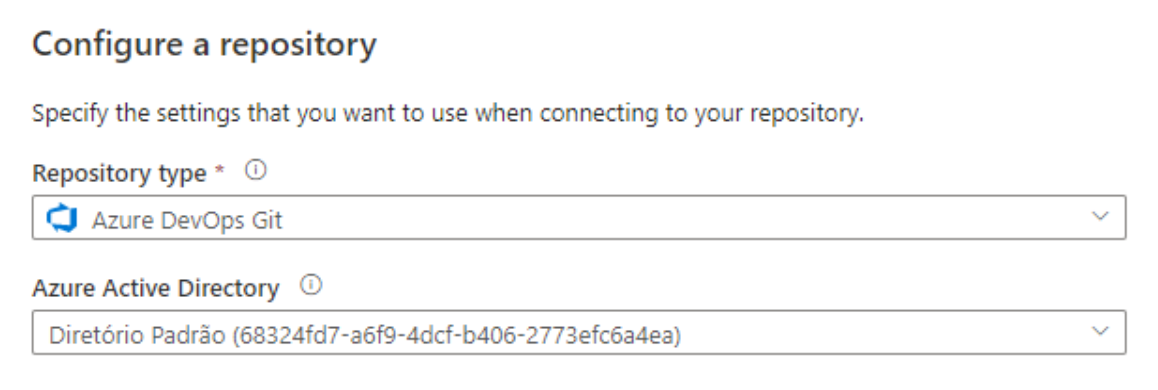
Select your organization and AAD
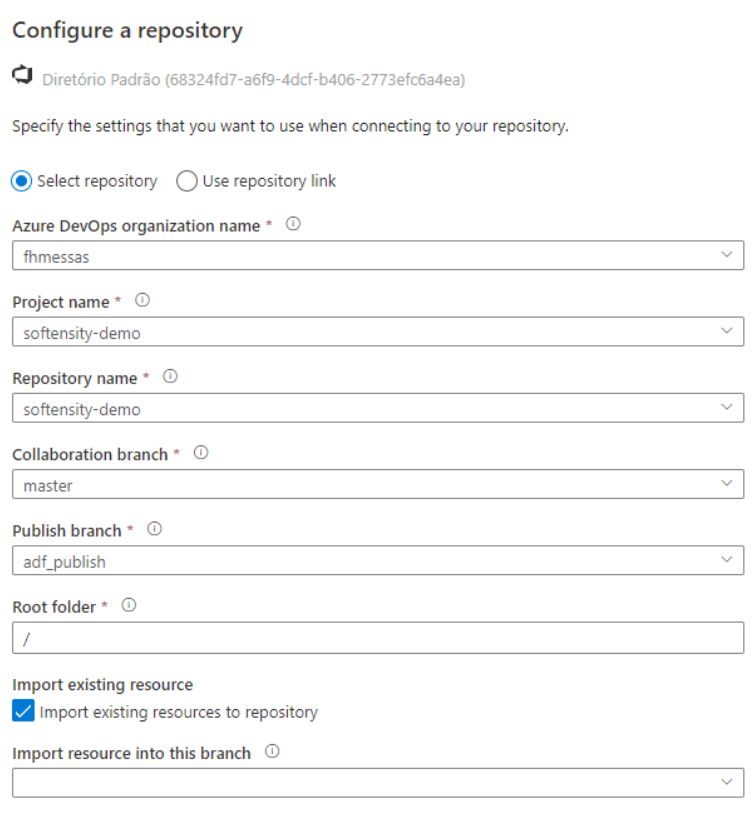
The next step is to set up your project. Here we have a few key fields:
- Collaboration branch – is the main branch used by ADF to publish. Usually, this branch should be protected and each team member should create their own branch to perform pull requests. The collaboration branch should always maintain valid and production ready code.
- Publish branch – is the branch used by ADF CI/CD to store metadata.
- Import existing resource – If your ADF already has code in it, this is recommended to export everything to your repo.
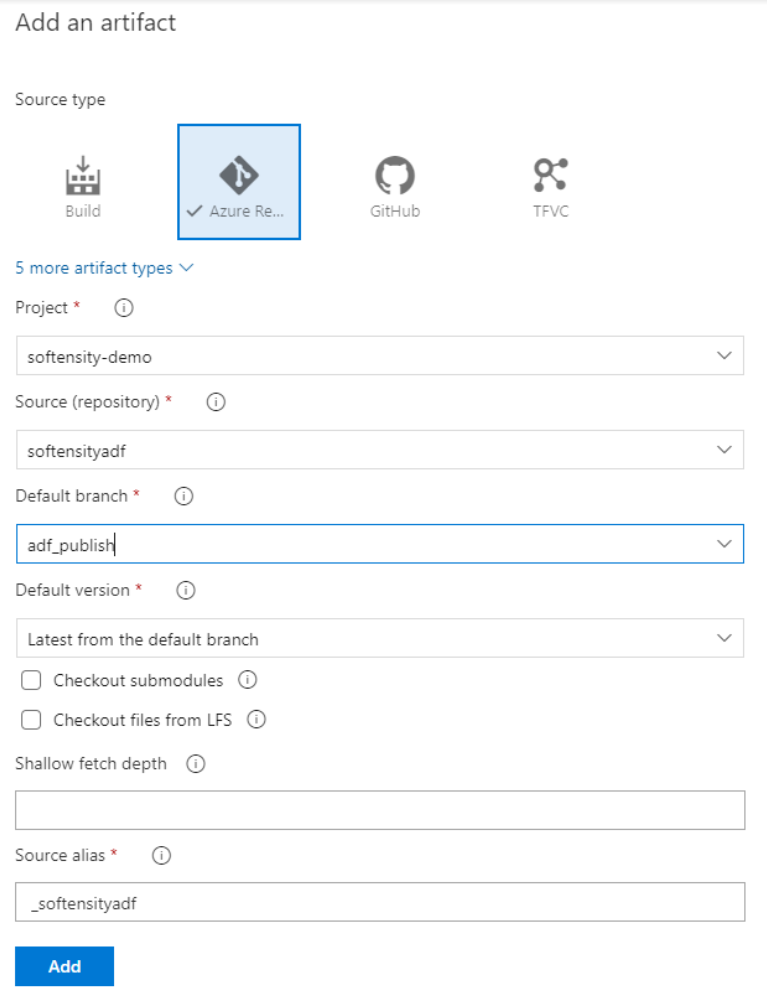
Now that everything is set up, let’s start our CI. Let’s get back to our repository and click in Releases, new pipeline. Click in Artifacts, Add an artifact, then connect to your repository and select the required information. For ADF, the Default branch should be adf_publish, the one created by ADF for storing metadata.
Next we must add the stages. Here you can choose many stages, including publishing to the UAT environment before publishing to production.
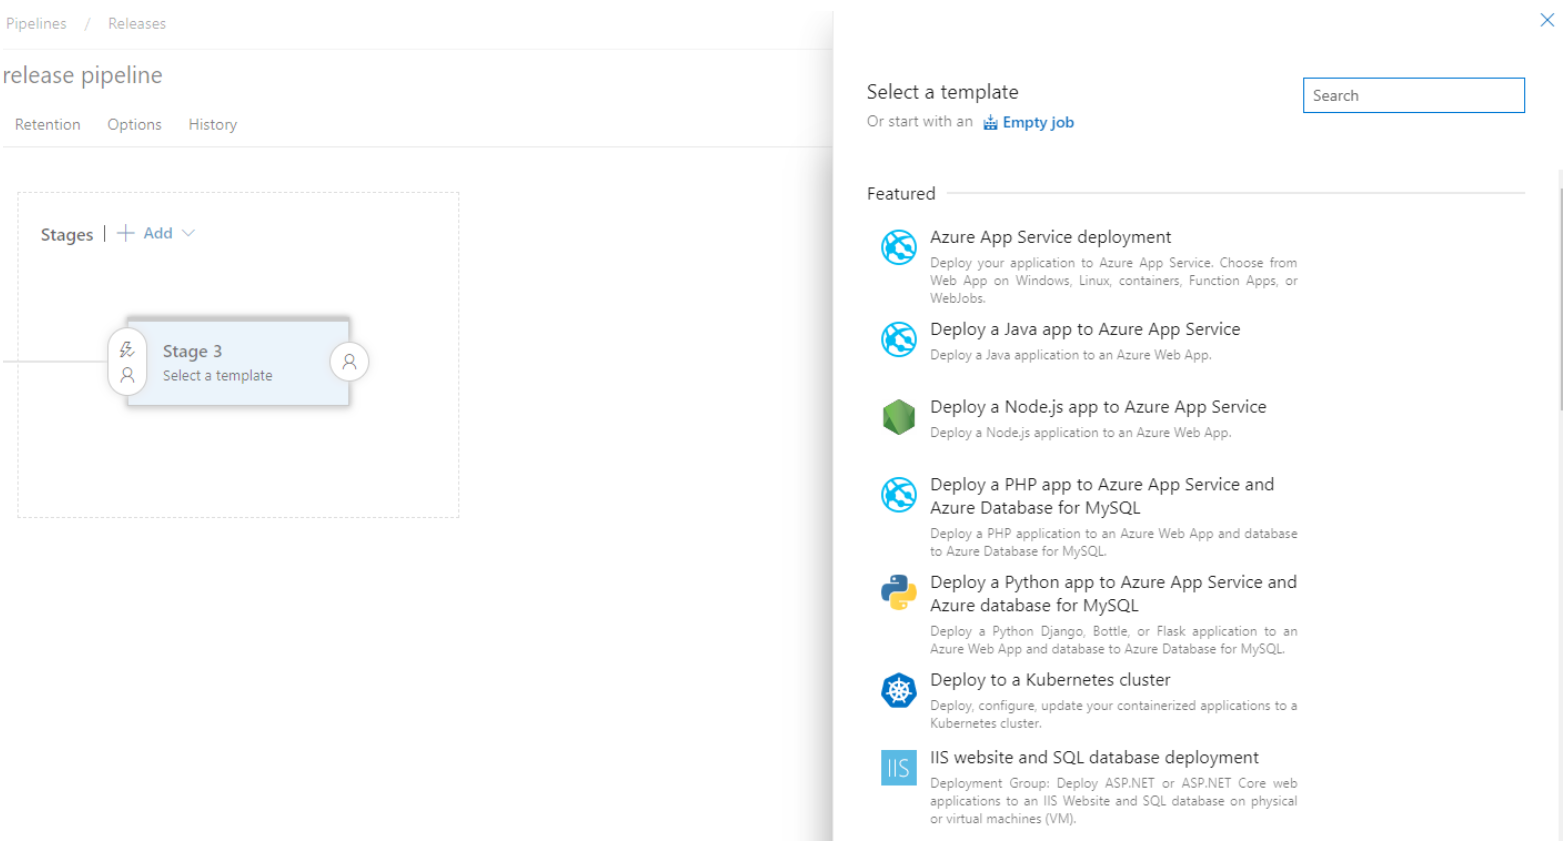
Select Empty job. By now your release should look like the below figure. Our next step is to create the deployment by Azure options.
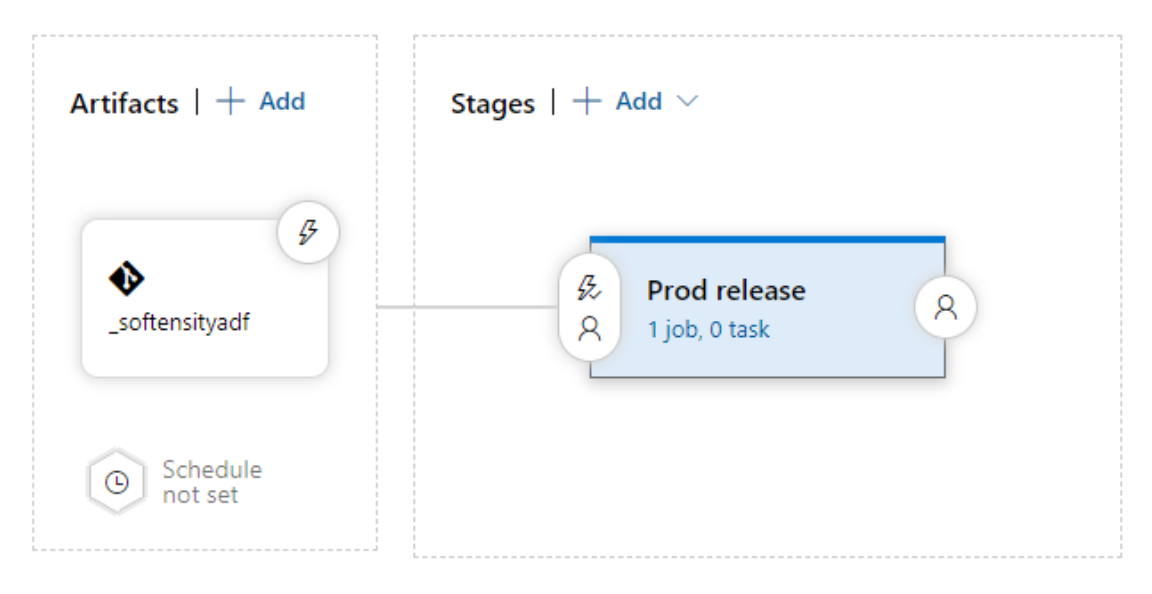
Select the job and add a new task.
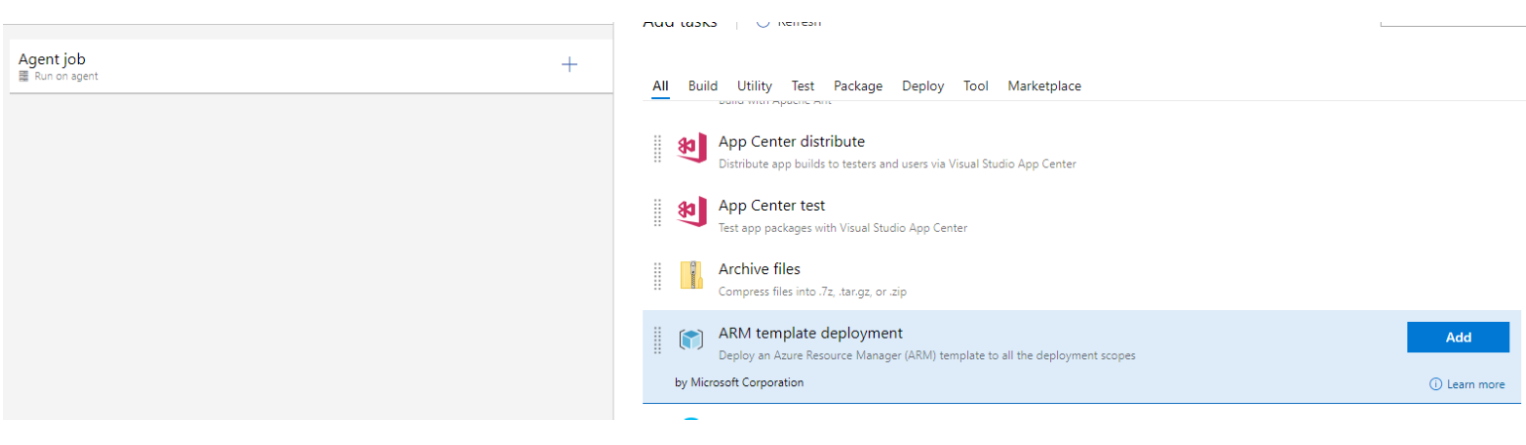
Here we are using the ARM template. ARM template is a JSON template containing all information about the resource being deployed. Find more information about ARM templates in MS docs found here.
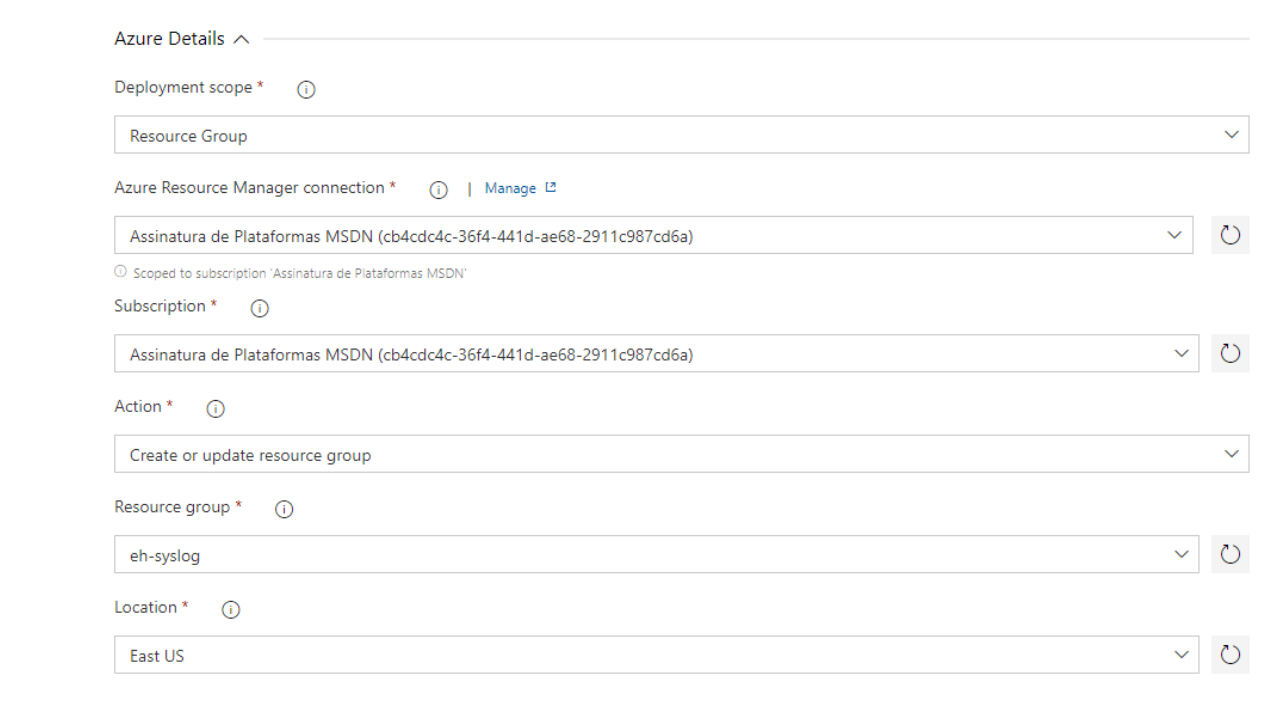
When adding the template some information will required, including:
- Deployment Scope – Management Group, Subscription and Resource Group. In this case we are deploying a Resource Group.
- Azure Resource Group Connection – Here you must select your subscription and authorize DevOps access.
- Action – Create or update a resource group, which is basically add or update new resources, or delete a resource group.
- Resource Group – the resource group that your ADF is in.
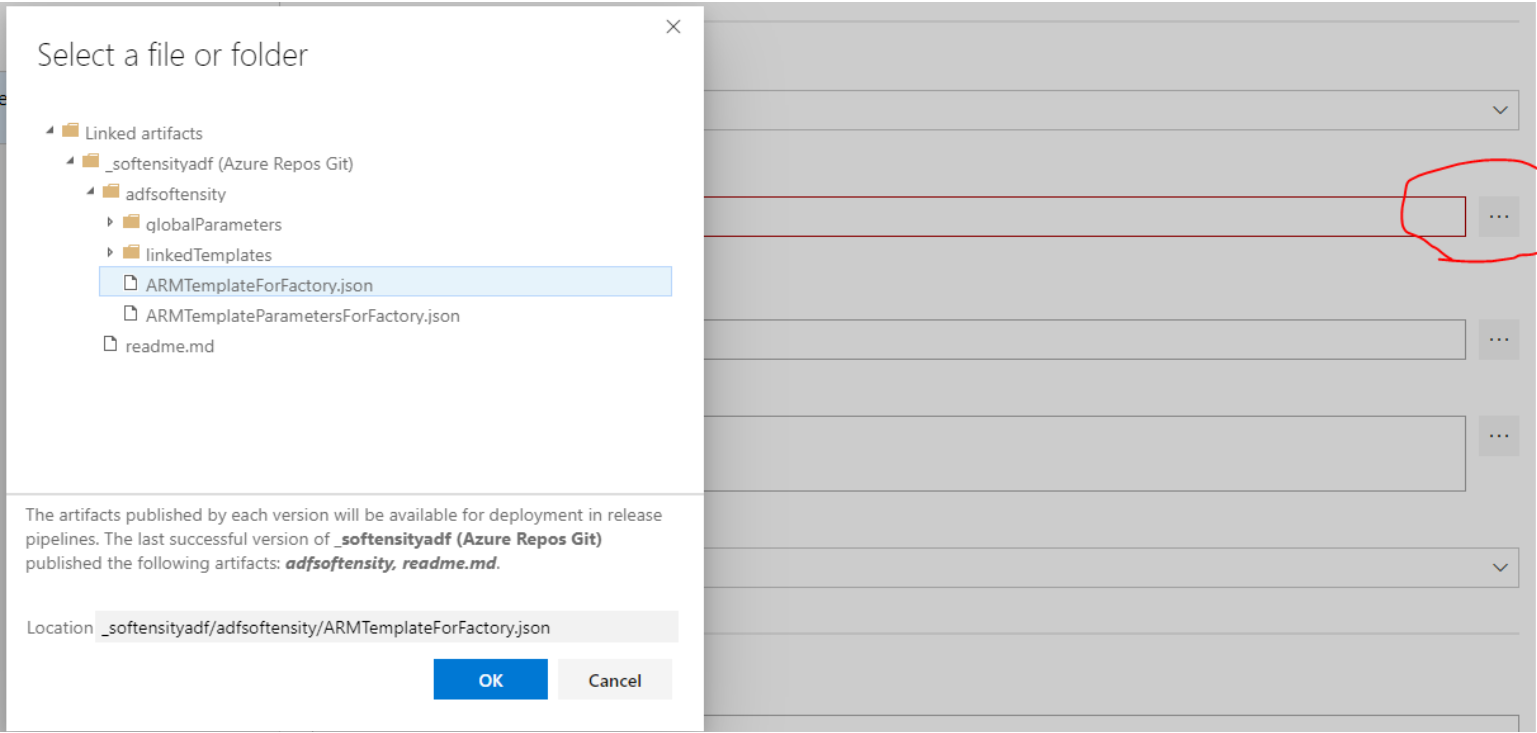
Beyond Azure details, we need to input information about our template. Just click on the ellipsis on the right and point to the ARMTemplate generated by ADF.
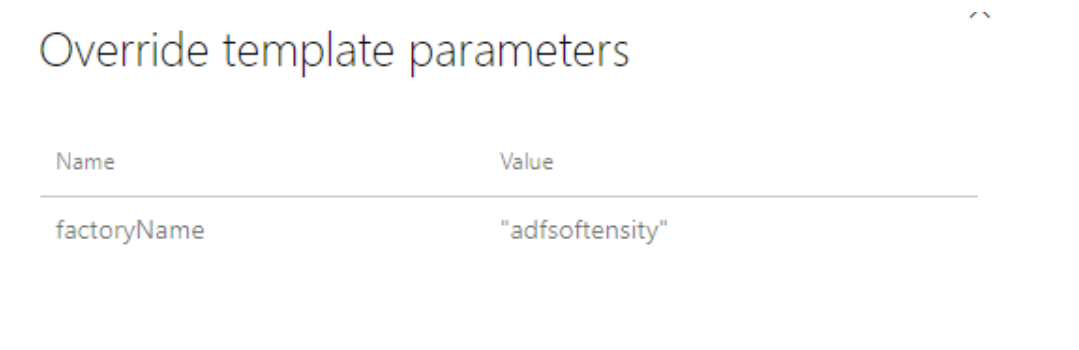
Template parameters are used in real world scenarios, where most connections have dev, UAT and prod parameters. This is really important to create a function release process that doesn’t depend on any manual change.
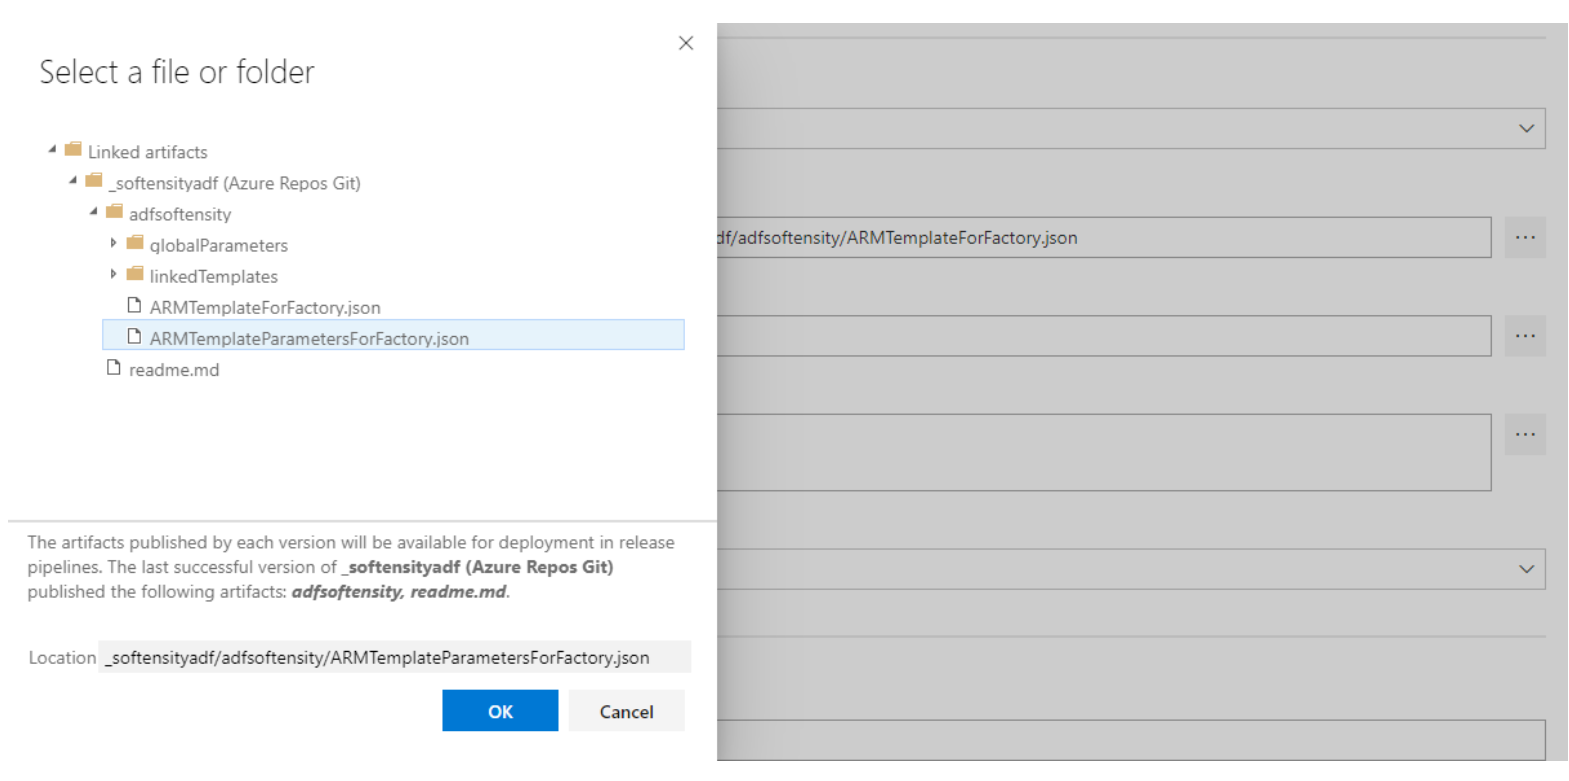
All your ADF parameters will be shown under the override template parameters, allowing you to change it during the release process.
All set, now it’s just a matter of running your process. There are additional options available that have been omitted here for the sake of simplicity. For instance, you can add validation pipelines, trigger based on pull request validation, and stop and start production triggers, which are recommended to prevent breaking the process.
About

Hi, I’m Fernando Hubner. I’ve been a Software Engineer for over a decade and for the last 5 years I have worked as a Data Engineer. I love coding and focus on clean code and performance tuning, whether a SGBD or new data technologies like Spark clusters. After more than 15 years working with .NET framework, I’m now focused on Scala and Pyspark. I also sometimes work in DevOps and create pipelines and CI/CD with YAML and other deployment frameworks out there.